Grand Opening of Geyer Gallery

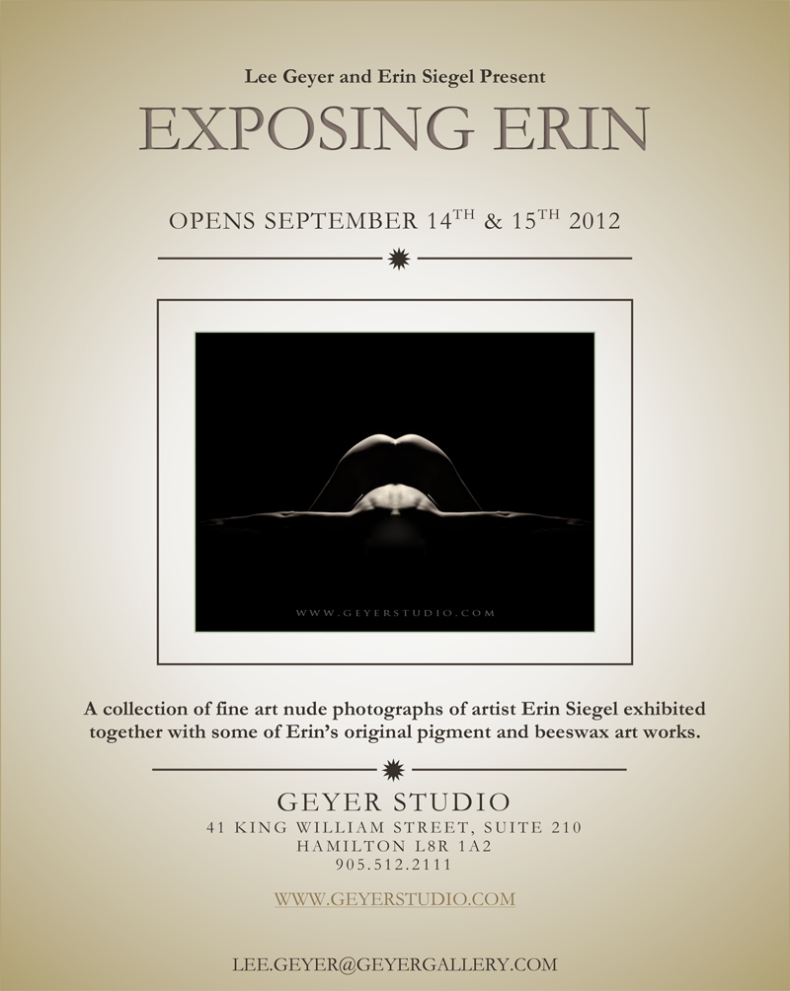
I am pleased to announce the opening of Geyer Gallery on September 14th and 15th in time for the Hamilton Supercrawl.  The first exhibition is entitled “Exposing Erin” and will feature a collection of fine art and figurative nudes of artist Erin Siegel alongside her own pigment and beeswax art works.

Please feel free to drop in on Friday the 14th in the evening or all day Saturday.

Hope to see you there.

Lee

Image

More play with paint

Heather, a runway model from Liverpool does her first shoot in the nude and gets messy :)

Heather, a runway model from Liverpool does her first shoot in the nude and gets messy 🙂

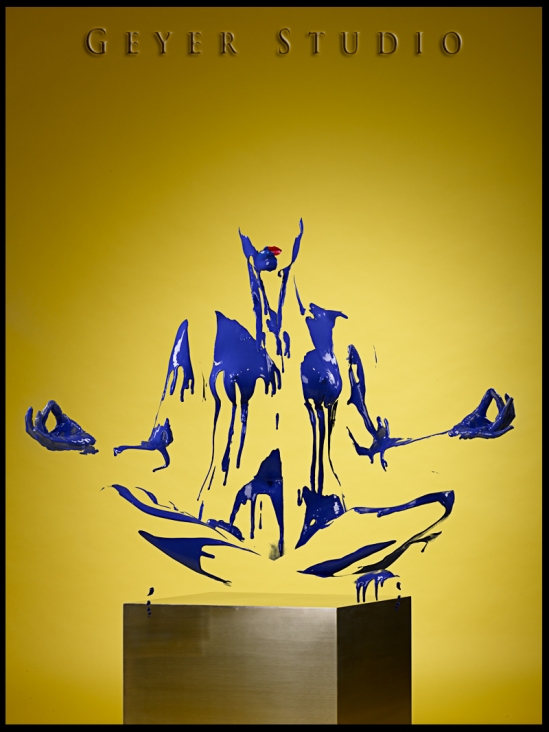
Loving playing with paint in the studio.  My friend (and hairstylist) Theo applies paint to models by pouring it out of the bottle, and I photograph it wet and dripping.  The special effect of the “invisible lady” in which only the paint is revealed is particularly pleasing.  Yesterday I had Heather, a runway model from Liverpool England in the studio.  She had never done a nude shoot before, and had no intentions of doing more.  But she loved the paint idea and so replied to one of my casting calls for this project.

Enjoy:

Heather, a runway model from Liverpool does her first shoot in the nude and gets messy 🙂

Back in action, and pumped about a new series

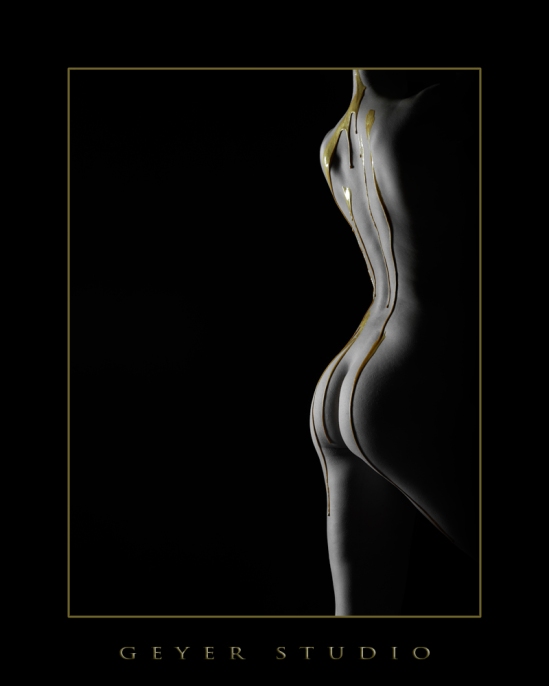
In June I fractured two vertebrae falling 25 feet on my back.  One of the worst consequences was that I could not shoot for several months.  Hence, no posts here.  Well I’m back, and pumped about a new series I will be developing.  It is a twist on body painting, in which only the painted portion of the body is revealed.

Here is a sample:

Body painting:  Invisible Elle

Invisible Elle

If you would like to model in this series, I would love to hear from you.  Males and females of all shapes and sizes, please don’t hesitate to contact me about this series.  Lee

Little Eriond

I don’t do a lot of baby shoots.  In fact I have only done a few.  But I was doing one on the weekend and when it came time to feed the little gaffer I suggested a breastfeeding shot and the mother (Angeline) agreed that would be nice.

I know that one of the most memorable images in my own mind is my little boy breast feeding.  There is something just so natural and peaceful about such a scene.  Here, the composition is a little unorthodox.  I doubt many babies are fed this way, but it was how I envisioned the shot.  Of all of the shots of little Eriond, in his outfits, in his birthday suite, with and without his mommy, this is my favourite.


Eriond breast feeding

Eriond breast feeding

There is no frontal light in this image.  In fact, the studio “house lights” are off.  Two 1×4 foot softboxes are aimed at the very large white backdrop and two black flags protect the camera from too much bounce.  All of the frontal light is wrap around from the very large wall of white light about one foot or so behind Eriond and mommy.


The Profoto Zoom Spot Small

The last light modifier I picked up was the profoto zoom spot small.  I hadn’t had a chance to use it until this past weekend when a model wanted to have pictures in a variety of outfits (and without outfits).  To change things up I pulled out the zoom spot small and, based on this shoot, I thought a post on this baby might be of interest.  When I was researching this modifier I could find almost no info.  Here is what I think.

What I love about it is the ability to  add gobos to create a variety of window light looks quickly.  One minute I had the model up against pink paper with a theatrical window look; then a quick gobo change and a warming gel and repositioning up against a grey studio wall and the set changes from a theatrical stage look to warm and steamy window light.  Then off with that, a few strip lights and we are doing artistic nudes:

A caution though:  the profoto zoom spot small gets hot.  And because it is blocking so much light, you don’t get f/8 at 10 feet with a 1200 watt/second blast from a profoto pack.  At ISO 50 (for the Phase One P65+) and about 10-12 feet away from the background, I was shooting f/2.8.  If you want real power, you will have to spend considerably more on the full size zoom spot with built in flash.  But, for under $1000, the zoom spot small is great fun.

Sample image from Phase One IQ 180

The new king of the medium format hill is Phase One‘s IQ180; if you want one, it will cost you about $50K.

I am pretty exciting about this new offering, not just because it ups the image resolution from 60 to 80 megapixels.  Some of the other new features are very welcome including a high resolution retina display, focus mask, live view, and battery charging while shooting tethered.    I think this digital back, with the live view and focus mask will work very well with technical cameras such as my Arca Swiss M-Monolith.  Read all about it at the luminous landscape and elsewhere.

I had the opportunity to shoot some sample images last week and am posting one here so that you can have a look for your self.  The model, lighting, digital back, coffee etc. were provided by B3K digital in Toronto.  For whatever reason, they set everything up at ISO 100; the actual native ISO is 50, but the following were shot at ISO 100.  Note that no adjustments were applied whatsoever.  The raw files were processed to JPEGS in Capture One Pro, and photoshop was used to create a zoomable image.

The image captured at ISO 100. The black part in the upper left corner is the edge of a giant parabolic reflector. Click the image to open a zoomable image in a new window, or look at the 100% crops below.

100% Crop

100% crop of earring

Kinbaku-bi (緊縛美?), Shibari, bondage….whatever, it is beautiful.

One of the highlights of 2010 for me was being introduced to, and having the opportunity to work with, a local chap who professionally calls himself Lord Morpheous (http://www.lordmorpheous.com/).  “Morph” is a local boy who worked local farms and got pretty good at handling rope.  Those skills, combined with an obviously kinky mind, led him to develop a talent for what is often called Shibari, or more simply bondage.  But beautiful bondage.  Really beautiful.  He is now a well known sex educator, and is the author of a successful book:  How to be Kinky:  A Beginner’s Guide to BDSM, and is soon releasing his second book How to be Kinkier. The first book has done very well on Amazon.com where you can get a copy:  How to be Kinky.  It is also available at Indigo, Chapters, and at better kinky stores in Toronto.

The first time I met Morpheous he came to my studio and we did two kinds of images:  a suspension and a partial suspension of one of my favourite local models.  For the suspension, two of my heaviest studio stands were set up and a two-by-four was clamped between them so that Morpheous could  suspend the model (Elle, a.k.a Elle Kingsley on the naked news) as if in space.  Morpheous spent a great deal of time with Elle, being sure she was comfortable and safe at every step of the way.

As he prepared Elle, I set up my lighting and framed the shot.  I was looking for a “fine art” feel, and so had set up a black backdrop and two profoto 1×4 foot strip soft-boxes with the external diffuser removed.  This rim lighting is one of my favourite was to light the nude figure.  When Morpheous was done rigging Elle, he gave her a gentle spin and I captured as many images as I could for about five minutes before we gently brought Elle down.  One of my favourites, is what I call:  “I can’t come to the phone, I’m a little tied up”.


I can't come to the phone right now, I'm a little tied up.


Another great shot from that shoot is the partial suspension.  For this, Elle was placed on a table with similar lighting, though with a little more intensity.  The strop soft-boxes were brought a little closer to the camera position to provide more wrap around Elle’s body.   In addition, a widezoom reflector was placed behind the table and angled up to provide some pop to her hair blowing from a large studio fan.


Elle, I can't come to the phone right now, I'm a little tied up.... (II)


This was my first of two shoots with Morpheous, and I hope to have many more.  His art is incredible, he is very generous with his knowledge, and has worked well with me and my models.

If you like this post, let me know and I’ll follow up with my second Morpheous shoot with a fine Asian model at the Hazelton Hotel.


The making of a fine art nude

Back in the fall of 2010 I spent a weekend shooting lingerie, shibari and fine art nudes with four different models at the Hazelton Hotel.  Most of the shooting was done with a Phase One P65+ and Phase One DF with profoto strobes and a variety of light modifiers.  But a few days before the shoot, after a long wait, my Arca Swiss M-Monolith view camera arrived.  I just had to unpack it, set it up and give it a go.

Since a view camera is a slow, contemplative tool, it is not suited to shooting fashion, glamour, or most of what I was doing that weekend.  But shooting artistic nudes?  Sure, why not?  I set up the Arca in the living room and framed the camera on the doors to the balcony of the suite before the model arrived.  This gave me time to focus the camera and set up the framing.  When the model arrived, I merely showed her where I wanted to photograph her.

The model, (Erin), was a very experienced nude model, and is herself an artist.  She was perfect.  Not only was her body beautifully proportioned, she knew how to pose fabulously creating interesting lines within the frame.

The problem with the world is that the dynamic range (the range of light and shadows) can sometimes be far beyond the dynamic range of film or a digital sensor.  The P65+ I paired with the Arca Swiss has about as good a dynamic range as one can get now, but the scene I was capturing every time I pressed the cable release did extend beyond that which could be captured by a single exposure.   And given that it was my first shoot with the Arca, I had forgotten to bring a sync cable to use fill flash to balance the internal light with the more powerful sunlight coming through the balcony.  Consequently, the raw capture was exposed perfectly (or at least as I wanted it) for the model, missed the shadows inside the room, and was blown out in the highlights outside.

But, processing the raw files three times (as captured, pushed two stops, and pulled two stops) in Capture One Pro, layering the files and masking selected portions of each of the three layers reveals enough of the shadows inside the room, and retains the highlight detail outside.  Here is one of those shots, at pulled two stops, as shot, and pushed two stops.

Clearly, the image as captured was just fine, but not fine art; there are details in the shadows of the drapes that I wanted to recover, and the outside buildings are pretty blown out.  The image underexposed by two stops reveals the details in the buildings outside the room but blocks up the shadows in Erin’s body a bit too much for my liking.  And the image overexposed by two stops reveals the details in the drapes, while totally blowing out large areas of the background and balcony.

Layering these images, masking out the portions that are undesirable produces an image that I am pleased with:  the folds in the drapes are present but not distracting;  there is some detail in the background buildings above the steam; and Erin’s beautiful pose is the centrepiece.

Erin, artistic nude at the Hazelton Hotel. Arca Swiss M Monolith, Schneider Kreuznach Apo Digitar 72mm @ f8 for 0.5 seconds, P65+ digital back @ ISO 50; three layer TIFF files from a single capture to extend dynamic range.

Zoomify – how to share high resolution digital images

Zoomify is a gem of a program that helps you share super-high resolution images with clients.  Portraits, glamour, boudoir, and maternity type images do not require high resolution proofs.  But some of my clients have products or artwork in which high resolution proofs are ideal, but too big for email.

I stumbled upon a zoomify (http://www.zoomify.com/), which has free and paid versions and, surprise surprise, is built into photoshop CS5.

Take for example an image I shot for a local Hamilton artist.  The original shot

  • is 60.5 megapixels and was shot on a Phase One P65+ digital back with
  • the Mamiya 120mm digital macro lens in my studio, and
  • was lit with two 1×4 foot profoto strip softboxes angled so that there would be no direct reflections from the metal in the cell phone, and the light would be even over the painting.

The small email version is nice, but it is difficult to evaluate.  Now check out the “zoomified image” by clicking on the link below and, go ahead, zoom in. You can see the paint strokes and the texture of the canvas.  He has a cell phone in the sky.  You can read the individual letters on the chips.

Theo Koutalos Mixed Media painting

Zoomify is an incredibly easy and efficient way to share super high resolution images with clients.  I love it.  So did Theo.  This was the first painting I shot for him.  He is bringing 25 more.

When purple photographs like blue – and what to do about it.

I have a client that makes one-of-a-kind hats, bags, and occasionally other garments.  Her stuff is pretty cool, and she is a great lady.  Because they are one-of-a-kind, she wants them photographed before she sells them.  Here is one of my favourite hats that she produced on a model in my studio.  Sometimes I just shoot the product, sometimes I put it on a model for fun. You can see (and purchase) more of her unique stuff here:  www.m2m-embellishments.com.

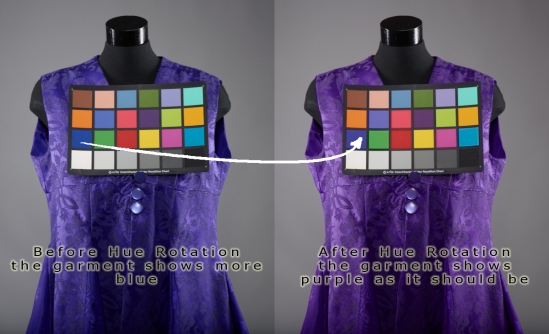
So here is the deal:  one day I am photographing a purple vest and it looks blue on my very large Macintosh monitor.  I always shoot tethered to the computer in the studio.  In any case, I think that I forgot to set the white balance.  So I put up my colour card and set a white balance and it is still blue.  I start thinking that I am losing my mind.

So I call one of “my guys”.  Everyone needs a guy.  For this, I call one of the guys I have bought my high end gear from:  Walter Borchenko .  Walter is the founder of B3K digital in Toronto and is the author of Capture-U, an independent source of online training for Phase One’s capture One software.  Capture One is a raw processing software package and is what I use for all of my raw processing.

Before I can even finish explaining exactly what was going on Walter says “let me guess, it is photographing blue”.  I sighed some relief.  He knew something about this.  He explained that manufacturers of garments were using ultraviolet exciters to trick our eyes into thinking that blue fabrics are actually purple.  It must be cheaper or something.  I don’t even care.  “How do I fix this?… My client is coming to pick up the images today”.

It is easy to fix this in Capture One.  On the colour editor tab, use the eye dropper to select the blue of the garment.  Then, do a hue rotation until the colour of the garment is correct.  What is perfect about this is that none of the other colours in the image are affected.

So, if your purple is showing up blue, it just might be the ultraviolet exciters.  And if you need a copy of Capture One you can purchase it from Walter at B3K right on his web site.